Last Updated: December 2025 | Oracle 19c | ASM Grid Infrastructure
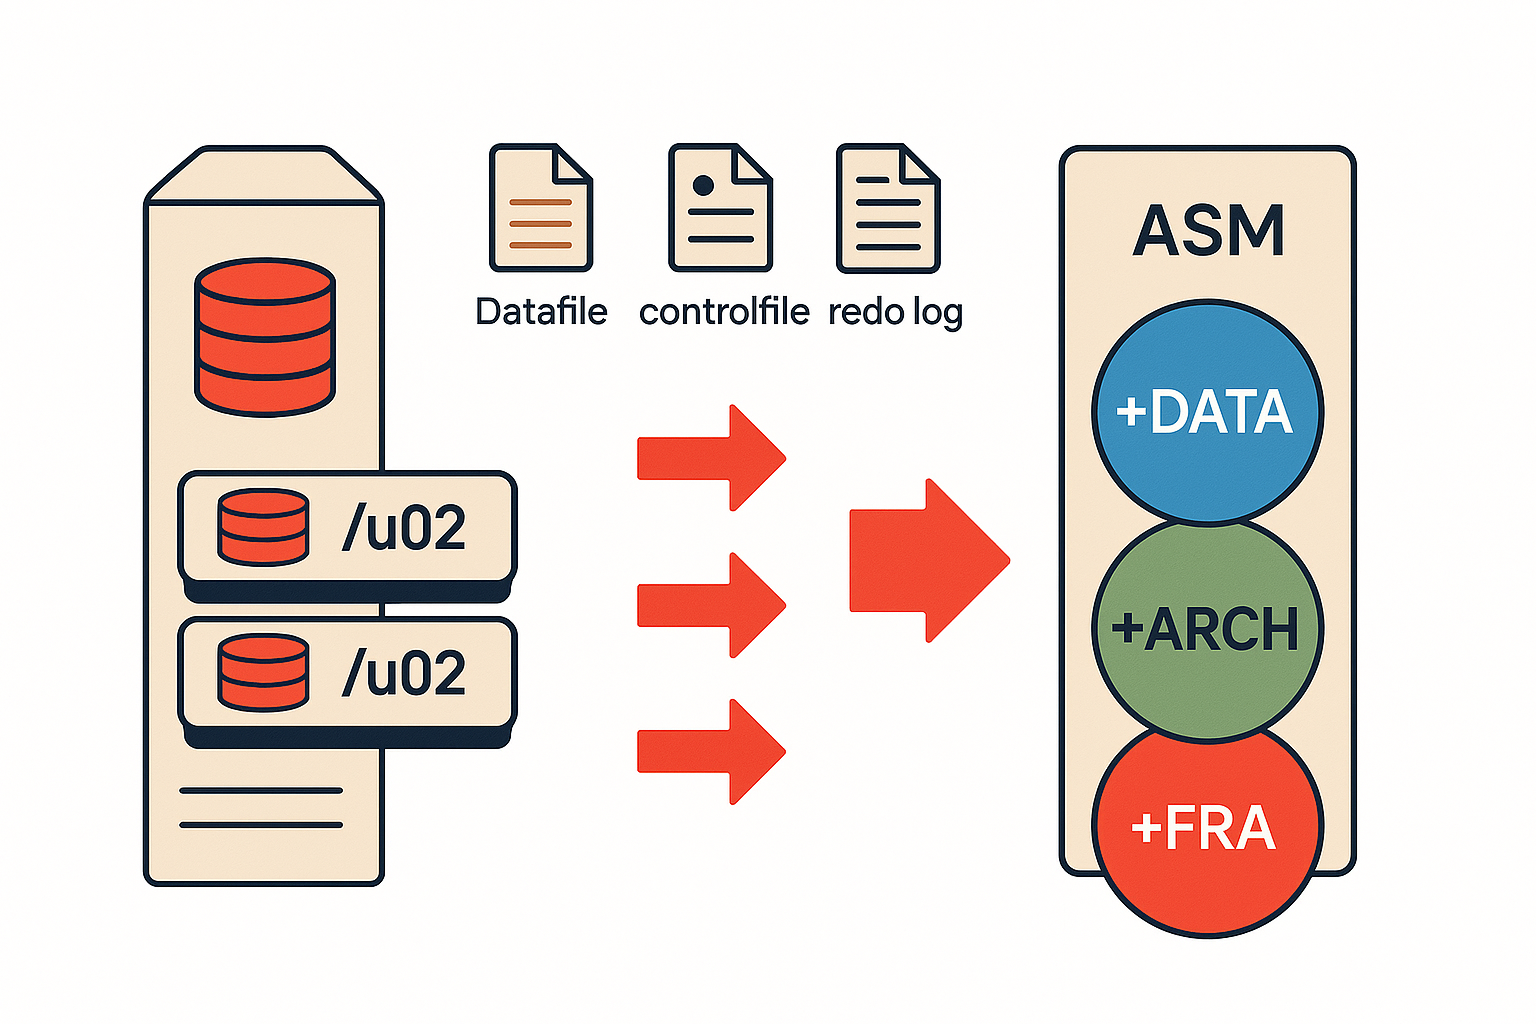
Migrating an Oracle 19c CDB from local storage to ASM has six viable methods — and choosing the wrong one means unnecessary downtime or a failed rollback. This guide documents the complete migration of a production CDB with one PDB: datafiles, controlfiles, redo logs, temp files, archive destination, and FRA — all moved to ASM diskgroups (+DATA, +ARCH, +FRA) using ALTER DATABASE MOVE DATAFILE. Commands are verified on Oracle 19.25.0.0 with Oracle Restart.
📋 What This Guide Covers:
- All 6 migration methods explained – ALTER DATABASE MOVE, RMAN BACKUP AS COPY, RMAN BACKUP/RESTORE, Data Pump, Transportable Tablespaces, and Manual Copy
- Detailed comparison matrix – Downtime, complexity, speed, and CDB/PDB support for each method
- Our method selection rationale – Why we chose ALTER DATABASE MOVE for this scenario
- Complete step-by-step implementation – Real commands, outputs, and validation for CDB/PDB architecture
- Troubleshooting guide – Common issues and their solutions
- Decision framework – Help you choose the right method for your environment
This comprehensive guide walks you through the complete migration process from local storage to ASM diskgroups (+DATA, +ARCH, +FRA) using the optimal approach for Oracle 19c. What made this case particularly interesting was the CDB/PDB architecture, which requires special handling compared to traditional non-CDB databases.
Understanding the Migration Scope
Why Migrate to ASM?
Oracle Automatic Storage Management provides enterprise-grade storage management with several critical advantages:
- Automatic Load Balancing: ASM distributes I/O evenly across all available disks
- Simplified Administration: No need for LVM, RAID, or filesystem management
- Online Storage Reconfiguration: Add or remove disks without downtime
- Built-in Redundancy: Normal, High, and External redundancy options
- Better Performance: Optimized for Oracle database I/O patterns
- Integration with Oracle Restart: Seamless integration in standalone configurations
Our Migration Scenario
Environment Details:
- Database Version: Oracle 19c (19.25.0.0)
- Architecture: Container Database (CDB) with one Pluggable Database (PDB)
- Database Size: 10GB
- Current Storage: Local filesystems
- Target Storage: ASM with three diskgroups
- Configuration: Oracle Restart (standalone ASM, not RAC)
- Downtime Available: Yes (for controlfile migration only)
Source Layout:
/u02/oradata/ORCL/          → Datafiles (CDB, PDB$SEED, PDB)
/u02/oradata/ORCL/control*.ctl → Controlfiles
/redo01/redo01.log          → Redo log group 1
/redo02/redo02.log          → Redo log group 2
/redo03/redo03.log          → Redo log group 3
/u02/oradata/ORCL/temp*.dbf → Temp files
/u02/oracle/ARCH/oradata    → Archive logs
/u02/oracle/FRA/oradata     → Fast Recovery Area
Target ASM Diskgroups:
+DATA  → Datafiles, controlfiles, redo logs, temp files
+ARCH  → Archive logs
+FRA   → Fast Recovery Area (backups, flashback logs)
All Oracle to ASM Migration Methods Explained
Before diving into our specific migration, let’s review all available methods for migrating Oracle databases to ASM. Understanding these options helps you choose the best approach for your environment.
Method 1: ALTER DATABASE MOVE DATAFILE (Oracle 12c+)
How It Works: Oracle 12c introduced the ALTER DATABASE MOVE DATAFILE command, which performs online datafile migration with automatic metadata updates.
ALTER DATABASE MOVE DATAFILE '/path/to/datafile.dbf' TO '+DATA';
Advantages:
- ✅ Online operation – Database remains open and available
- ✅ Automatic – Oracle handles copying, switching, and controlfile updates
- ✅ Simple syntax – Single command per file
- ✅ No RMAN complexity – Uses SQL directly
- ✅ CDB/PDB aware – Works seamlessly with multitenant architecture
- ✅ Immediate validation – Can verify after each file
Disadvantages:
- ❌ Oracle 12c+ only – Not available in 11g or earlier
- ❌ One file at a time – Cannot parallelize easily
- ❌ Locks during switch – Brief lock during final switch (usually < 1 second)
- ❌ Datafiles only – Doesn’t handle controlfiles, redo logs, or temp files
- ❌ Source file remains – Must manually clean up old files
Best For:
- Oracle 12c or later databases
- Minimal downtime requirements
- Small to medium databases (< 100GB per file)
- When you want granular control over each file
Downtime Required: Minimal (seconds per file during switch)
Method 2: RMAN BACKUP AS COPY + SWITCH DATABASE
How It Works: Use RMAN to create image copies in ASM, then switch the database to use those copies.
rman target /

# Backup database to ASM as image copies
RMAN> BACKUP AS COPY DATABASE FORMAT '+DATA';

# Switch database to use ASM copies
RMAN> SWITCH DATABASE TO COPY;

# Update controlfile to reflect new locations
RMAN> SWITCH DATAFILE ALL;
Advantages:
- ✅ Works on all versions – Oracle 10g, 11g, 12c, 19c, 21c
- ✅ Online operation – Database can remain open during backup
- ✅ Parallel copying – RMAN can use multiple channels
- ✅ Comprehensive – Can include all database files
- ✅ Backup doubles as migration – You get a backup in the process
- ✅ Rollback capability – Easy to switch back if needed
Disadvantages:
- ❌ Double space required – Need space for both source and ASM copies temporarily
- ❌ More complex – Requires RMAN knowledge
- ❌ Two-step process – Backup, then switch
- ❌ Brief downtime for switch – Database must be mounted (not open) for SWITCH
Best For:
- All Oracle versions (10g, 11g, 12c, 19c, 21c)
- When you want a backup as part of migration
- Large databases where parallel copy is beneficial
- When you have sufficient storage for temporary duplication
Downtime Required: 5-15 minutes (for SWITCH DATABASE operation)
Complete Example:
# Step 1: Backup as image copies to ASM (database OPEN)
rman target /
RMAN> BACKUP AS COPY DATABASE FORMAT '+DATA';
RMAN> EXIT;

# Step 2: Switch to ASM copies (requires MOUNT)
sqlplus / as sysdba
SHUTDOWN IMMEDIATE;
STARTUP MOUNT;

rman target /
RMAN> SWITCH DATABASE TO COPY;
RMAN> EXIT;

sqlplus / as sysdba
ALTER DATABASE OPEN;
Method 3: RMAN BACKUP/RESTORE with RMAN CONVERT
How It Works: Take RMAN backup of entire database, then restore to ASM using RMAN’s restore commands.
# Backup current database
RMAN> BACKUP DATABASE PLUS ARCHIVELOG;

# Shutdown current database
SHUTDOWN IMMEDIATE;

# Restore to ASM (requires downtime)
STARTUP NOMOUNT;
RESTORE CONTROLFILE TO '+DATA' FROM '/backup/controlfile.bkp';
ALTER DATABASE MOUNT;
RESTORE DATABASE;
SWITCH DATABASE TO COPY;
RECOVER DATABASE;
ALTER DATABASE OPEN;
Advantages:
- ✅ Clean migration – Fresh start in ASM
- ✅ Works on all versions – 10g onwards
- ✅ Comprehensive – All files migrated together
- ✅ Backup included – Migration uses existing backup
- ✅ Good for testing – Can restore to test environment first
Disadvantages:
- ❌ Significant downtime – Database must be shut down
- ❌ Time-consuming – Full restore takes hours for large databases
- ❌ Complex recovery – Requires careful RMAN scripting
- ❌ Risk of failure – If restore fails, need to fall back to original
Best For:
- Planned migrations with acceptable downtime windows
- When you want a completely fresh database in ASM
- Testing and development environments
- When combining with version upgrades or platform migrations
Downtime Required: Hours (depends on database size)
Method 4: Data Pump Export/Import
How It Works: Export database using Data Pump, create new database on ASM, then import.
# Export from source
expdp system/password FULL=Y DIRECTORY=export_dir DUMPFILE=full_db.dmp

# Create new database on ASM
# (using DBCA or manually with CREATE DATABASE)

# Import to ASM database
impdp system/password FULL=Y DIRECTORY=export_dir DUMPFILE=full_db.dmp
Advantages:
- ✅ Clean new database – No legacy fragmentation
- ✅ Version upgrade opportunity – Can upgrade during migration
- ✅ Platform independence – Can migrate between OS platforms
- ✅ Selective import – Can exclude/include specific schemas
- ✅ Reorganization opportunity – Clean up tablespaces, users, etc.
Disadvantages:
- ❌ Significant downtime – Hours to days for large databases
- ❌ Most time-consuming – Export + create DB + import
- ❌ Metadata issues – May encounter import errors
- ❌ Space required – Need space for dump files
- ❌ Not for large databases – Impractical for TB-scale databases
Best For:
- Small databases (< 50GB)
- When reorganizing database structure
- Migrating to different Oracle versions
- Platform migrations (e.g., Windows to Linux)
Downtime Required: Hours to days (depends on database size)
Method 5: Transportable Tablespaces (TTS)
How It Works: Export tablespace metadata, copy datafiles to ASM, then import metadata.
-- Make tablespaces read-only
ALTER TABLESPACE users READ ONLY;

-- Export metadata
expdp system/password DIRECTORY=export_dir DUMPFILE=tts.dmp
  TRANSPORT_TABLESPACES=users

-- Copy datafiles to ASM
RMAN> BACKUP AS COPY DATAFILE 4 FORMAT '+DATA';

-- Import into target (ASM-based database)
impdp system/password DIRECTORY=export_dir DUMPFILE=tts.dmp
  TRANSPORT_DATAFILES='+DATA/...'
Advantages:
- ✅ Fast for large tablespaces – Only copies datafiles, not data
- ✅ Minimal data transfer – Metadata export is small
- ✅ Selective migration – Can migrate tablespace by tablespace
- ✅ Cross-platform – Works between different OS platforms (with conversion)
Disadvantages:
- ❌ Complex process – Multiple steps with potential for errors
- ❌ Tablespace by tablespace – Not whole database at once
- ❌ Read-only requirement – Tablespaces must be read-only during export
- ❌ System tablespaces excluded – Cannot transport SYSTEM, SYSAUX, UNDO
- ❌ Version restrictions – Some restrictions on cross-version transport
Best For:
- Migrating specific tablespaces to ASM
- Very large tablespaces (100GB+)
- When most of database can remain on source
- Cross-platform migrations with tablespace conversion
Downtime Required: Partial (only for tablespaces being migrated)
Method 6: Manual Copy with Controlfile Rebuild
How It Works: Shutdown database, manually copy files to ASM, recreate controlfile with new paths.
# Shutdown database
SHUTDOWN IMMEDIATE;

# Generate controlfile creation script
ALTER DATABASE BACKUP CONTROLFILE TO TRACE;

# Manually copy datafiles to ASM using RMAN or ASMCMD
rman target /
RMAN> COPY DATAFILE 1 TO '+DATA';

# Edit controlfile creation script with ASM paths
# Startup and run modified script
STARTUP NOMOUNT;
@create_controlfile_asm.sql
ALTER DATABASE OPEN;
Advantages:
- ✅ Works on all versions – Even old Oracle versions
- ✅ Full control – You control every step
- ✅ No RMAN dependency – Can use OS copy commands if needed
- ✅ Educational – Understand exactly what’s happening
Disadvantages:
- ❌ Error-prone – Manual editing of controlfile script is risky
- ❌ Significant downtime – Database down during entire process
- ❌ Time-consuming – Lots of manual work
- ❌ No automation – Hard to script and repeat
- ❌ Dangerous – Easy to make mistakes that corrupt database
Best For:
- Learning exercises and training
- Very small databases in non-production
- When all other methods are unavailable
- Emergency recovery scenarios
Downtime Required: Hours (entire migration window)
Migration Methods Comparison Matrix
| Method | Oracle Version | Downtime | Complexity | Speed | CDB/PDB Support | Recommended For |
|---|---|---|---|---|---|---|
| ALTER DATABASE MOVE | 12c+ | Minimal (seconds) | Low | Medium | ✅ Excellent | Production, Modern Oracle |
| RMAN BACKUP AS COPY | 10g+ | Low (5-15 min) | Medium | Fast (parallel) | ✅ Good | All versions, Large DBs |
| RMAN BACKUP/RESTORE | 10g+ | High (hours) | Medium | Slow | ✅ Good | Planned migrations |
| Data Pump | 10g+ | Very High | Medium | Very Slow | ⚠️ Complex | Small DBs, Reorganization |
| Transportable TBS | 10g+ | Medium | High | Fast | ⚠️ Limited | Specific tablespaces |
| Manual Copy | All | Very High | Very High | Slow | ❌ Difficult | Learning only |
Choosing the Right Method: Our Decision
For our migration, we chose Method 1: ALTER DATABASE MOVE DATAFILE combined with traditional methods for controlfiles, redo logs, and temp files. Here’s our decision-making process:
Our Environment Requirements
Database Characteristics:
- Oracle 19c (ALTER DATABASE MOVE available ✅)
- Container Database (CDB) with one PDB
- Database size: 10GB (small, manageable)
- Production system (but downtime available for controlfile migration)
- Current location: Local filesystem (/u02, /redo01, /redo02, /redo03)
- Target: ASM diskgroups (+DATA, +ARCH, +FRA)
Business Requirements:
- Minimal downtime preferred (but not critical)
- Complete migration (all files to ASM)
- Clean, documented process for future reference
- Ability to validate at each step
- Risk mitigation (rollback capability)
Why We Chose This Approach
Primary Method: ALTER DATABASE MOVE DATAFILE
✅ Best fit for Oracle 19c: Native 12c+ feature, fully supported
✅ Minimal disruption: Datafiles migrate online, users unaffected
✅ CDB/PDB aware: Handles multitenant architecture perfectly
✅ Granular control: Migrate and verify one file at a time
✅ Simple syntax: Easy to understand and document
✅ Immediate validation: Query v$datafile after each move
Why NOT Other Methods:
❌ RMAN BACKUP AS COPY: Would work but requires double storage temporarily (our /u02 is nearly full)
❌ RMAN BACKUP/RESTORE: Too much downtime (hours) unnecessary for 10GB database
❌ Data Pump: Excessive downtime for simple storage migration
❌ Transportable TBS: Overly complex for whole-database migration
❌ Manual Copy: Too risky and error-prone for production
Our Hybrid Approach
Since ALTER DATABASE MOVE only handles datafiles, we combined it with traditional methods:
| Component | Method | Reason |
|---|---|---|
| Datafiles | ALTER DATABASE MOVE | Online, simple, native 19c feature |
| Controlfiles | RMAN RESTORE + parameter update | Standard practice, brief downtime acceptable |
| Redo Logs | ADD/DROP members | Online operation, no downtime |
| Temp Files | DROP/ADD (recreate) | Fast, no data loss risk |
| Archive Config | ALTER SYSTEM parameters | Configuration change only |
| FRA Config | ALTER SYSTEM parameters | Configuration change only |
Decision Framework for Your Environment
Choose ALTER DATABASE MOVE if:
- ✅ Oracle 12c or later
- ✅ Need minimal downtime
- ✅ Want granular control and validation
- ✅ CDB/PDB environment
- ✅ Small to medium datafiles (< 100GB each)
Choose RMAN BACKUP AS COPY if:
- ✅ Any Oracle version (10g+)
- ✅ Large database (benefits from parallel channels)
- ✅ Have sufficient temporary storage
- ✅ Want comprehensive approach
- ✅ Need backup as part of migration
Choose RMAN BACKUP/RESTORE if:
- ✅ Planned maintenance window with downtime
- ✅ Want completely fresh database in ASM
- ✅ Combining with other maintenance (version upgrade, etc.)
- ✅ Have good existing backups
Choose Data Pump if:
- ✅ Very small database (< 50GB)
- ✅ Need database reorganization
- ✅ Migrating to different Oracle version
- ✅ Acceptable downtime (hours/days)
Prerequisites and Pre-Migration Planning
Verify ASM Installation
Before starting the migration, ensure your ASM environment is properly configured:
-- Check ASM instance status
export ORACLE_SID=+ASM
sqlplus / as sysasm

SELECT instance_name, status, version FROM v$instance;
Expected Output:
INSTANCE_NAME    STATUS       VERSION
---------------- ------------ -------------
+ASM             OPEN         19.0.0.0.0
Verify ASM Diskgroups
-- Check all diskgroups are mounted and have sufficient space
SELECT name, state, type, total_mb, free_mb,
       ROUND((free_mb/total_mb)*100, 2) pct_free
FROM v$asm_diskgroup;
Expected Output:
NAME   STATE    TYPE    TOTAL_MB  FREE_MB  PCT_FREE
------ -------- ------- --------- -------- --------
DATA   MOUNTED  EXTERN  307200    280000   91.14
ARCH   MOUNTED  EXTERN  102398    102331   99.93
FRA    MOUNTED  EXTERN  102398    99932    97.59
Critical Space Calculation: For our 10GB database, we need:
- +DATA: ~15GB (database + 50% growth buffer)
- +ARCH: ~20GB (archive log retention)
- +FRA: ~50GB (backups + recovery files)
Document Current Configuration
-- Connect to CDB as SYSDBA
export ORACLE_SID=ORCL
sqlplus / as sysdba

-- Document all datafiles across containers
SET LINESIZE 200 PAGESIZE 1000
COL pdb_name FORMAT A20
COL file_name FORMAT A80

SELECT c.name pdb_name, d.con_id, d.file#, d.name file_name,
       ROUND(d.bytes/1024/1024, 2) size_mb
FROM v$datafile d, v$containers c
WHERE d.con_id = c.con_id
ORDER BY c.name, d.file#;

-- Document controlfiles
SELECT name FROM v$controlfile;

-- Document redo logs
SELECT l.group#, l.thread#, l.bytes/1024/1024 size_mb,
       l.members, l.status, lf.member
FROM v$log l, v$logfile lf
WHERE l.group# = lf.group#
ORDER BY l.group#;

-- Document temp files
SELECT c.name pdb_name, t.name temp_file,
       ROUND(t.bytes/1024/1024, 2) size_mb
FROM v$tempfile t, v$containers c
WHERE t.con_id = c.con_id
ORDER BY c.name;
Backup Strategy
Critical: Always take a fresh backup before any major migration:
rman target /

RMAN> BACKUP DATABASE PLUS ARCHIVELOG;
RMAN> BACKUP CURRENT CONTROLFILE FORMAT '/backup/controlfile_%U.bkp';
RMAN> LIST BACKUP SUMMARY;
Phase 1: Migrating Datafiles to +DATA
As explained in our method selection, we’re using ALTER DATABASE MOVE DATAFILE for this migration. This Oracle 12c+ feature allows online datafile migration with minimal disruption – a huge improvement over older methods that required downtime or complex RMAN scripting.
Understanding CDB/PDB Datafile Architecture
In a Container Database architecture:
- CDB$ROOT (con_id=1): System tablespaces (SYSTEM, SYSAUX, UNDO, TEMP)
- PDB$SEED (con_id=2): Template for creating new PDBs
- Your PDB (con_id=3+): Application data and user tablespaces
Each container must be migrated separately.
Step 1: Migrate CDB$ROOT Datafiles
-- Ensure you're in CDB$ROOT
ALTER SESSION SET CONTAINER=cdb$root;
SHOW CON_NAME;

-- Verify database is OPEN
SELECT name, open_mode FROM v$database;

-- Move SYSTEM datafile
ALTER DATABASE MOVE DATAFILE '/u02/oradata/ORCL/system01.dbf' TO '+DATA';

-- Verify immediately after each move
SELECT name FROM v$datafile WHERE file# = 1;
-- Expected: +DATA/ORCL/DATAFILE/system.XXX.XXXXXX

-- Move SYSAUX datafile
ALTER DATABASE MOVE DATAFILE '/u02/oradata/ORCL/sysaux01.dbf' TO '+DATA';
SELECT name FROM v$datafile WHERE file# = 3;

-- Move UNDO datafile
ALTER DATABASE MOVE DATAFILE '/u02/oradata/ORCL/undotbs01.dbf' TO '+DATA';
SELECT name FROM v$datafile WHERE file# = 4;

-- If you have additional CDB datafiles (USERS, etc.), move them too
-- ALTER DATABASE MOVE DATAFILE '/u02/oradata/ORCL/users01.dbf' TO '+DATA';
What Happens During MOVE DATAFILE:
- Oracle creates a new datafile in +DATA
- Copies data blocks from source to destination
- Updates controlfile with new location
- Synchronizes redo
- Switches to new datafile
- Old file remains on disk (manual cleanup later)
Performance Note: The MOVE operation locks the datafile briefly during the switch. For a 10GB database, each datafile move takes 2-5 minutes depending on I/O speed.
Step 2: Migrate PDB$SEED Datafiles
PDB$SEED is the template database and must be closed before migration:
-- Close PDB$SEED
ALTER PLUGGABLE DATABASE pdb$seed CLOSE;

-- Verify it's closed
SELECT name, open_mode FROM v$pdbs WHERE name = 'PDB$SEED';
-- Expected: PDB$SEED    MOUNTED

-- Move PDB$SEED datafiles
ALTER DATABASE MOVE DATAFILE '/u02/oradata/ORCL/pdbseed/system01.dbf' TO '+DATA';
ALTER DATABASE MOVE DATAFILE '/u02/oradata/ORCL/pdbseed/sysaux01.dbf' TO '+DATA';
ALTER DATABASE MOVE DATAFILE '/u02/oradata/ORCL/pdbseed/undotbs01.dbf' TO '+DATA';

-- Verify all moved
SELECT file#, name FROM v$datafile WHERE con_id = 2 ORDER BY file#;

-- Reopen PDB$SEED in READ ONLY mode (required for seed)
ALTER PLUGGABLE DATABASE pdb$seed OPEN READ ONLY;

-- Verify
SELECT name, open_mode FROM v$pdbs WHERE name = 'PDB$SEED';
-- Expected: PDB$SEED    READ ONLY
Step 3: Migrate PDB Datafiles
For your application PDB (let’s call it PDBPROD), you have two options:
Option A: From CDB$ROOT (Recommended)
-- Ensure you're in CDB$ROOT
ALTER SESSION SET CONTAINER=cdb$root;

-- Get your PDB name
SELECT name FROM v$pdbs WHERE name != 'PDB$SEED';
-- Example output: PDBPROD

-- Close the PDB
ALTER PLUGGABLE DATABASE pdbprod CLOSE IMMEDIATE;

-- Verify it's closed
SELECT name, open_mode FROM v$pdbs;
-- Expected: PDBPROD    MOUNTED

-- Move PDB datafiles one by one
ALTER PLUGGABLE DATABASE pdbprod
  MOVE DATAFILE '/u02/oradata/ORCL/pdbprod/system01.dbf' TO '+DATA';

ALTER PLUGGABLE DATABASE pdbprod
  MOVE DATAFILE '/u02/oradata/ORCL/pdbprod/sysaux01.dbf' TO '+DATA';

ALTER PLUGGABLE DATABASE pdbprod
  MOVE DATAFILE '/u02/oradata/ORCL/pdbprod/undotbs01.dbf' TO '+DATA';

ALTER PLUGGABLE DATABASE pdbprod
  MOVE DATAFILE '/u02/oradata/ORCL/pdbprod/users01.dbf' TO '+DATA';

-- If you have additional tablespaces, move those too
-- ALTER PLUGGABLE DATABASE pdbprod
--   MOVE DATAFILE '/u02/oradata/ORCL/pdbprod/custom_tbs01.dbf' TO '+DATA';

-- Verify all PDB datafiles moved
SELECT name FROM v$datafile
WHERE con_id = (SELECT con_id FROM v$pdbs WHERE name = 'PDBPROD');

-- Reopen the PDB
ALTER PLUGGABLE DATABASE pdbprod OPEN;

-- Verify PDB is open and functional
SELECT name, open_mode FROM v$pdbs;
-- Expected: PDBPROD    READ WRITE

-- Test PDB connectivity
ALTER SESSION SET CONTAINER=pdbprod;
SELECT * FROM dual;
ALTER SESSION SET CONTAINER=cdb$root;
Option B: From Within PDB (Alternative)
-- Switch to PDB
ALTER SESSION SET CONTAINER=pdbprod;
SHOW CON_NAME;

-- Move datafiles from within PDB
ALTER DATABASE MOVE DATAFILE '/u02/oradata/ORCL/pdbprod/system01.dbf' TO '+DATA';
ALTER DATABASE MOVE DATAFILE '/u02/oradata/ORCL/pdbprod/sysaux01.dbf' TO '+DATA';
-- Continue for all datafiles...

-- Switch back to CDB$ROOT
ALTER SESSION SET CONTAINER=cdb$root;
Validation: All Datafiles Moved
-- Critical validation: NO datafiles should remain on /u02
SELECT name FROM v$datafile WHERE name LIKE '/u02%';
-- Should return NO ROWS

-- Verify all datafiles are now in +DATA
SELECT c.name container, COUNT(*) datafile_count
FROM v$datafile d, v$containers c
WHERE d.con_id = c.con_id
  AND d.name LIKE '+DATA%'
GROUP BY c.name;

-- Expected output:
-- CDB$ROOT     4
-- PDB$SEED     3
-- PDBPROD      4
Phase 2: Migrating Controlfiles to +DATA
After all datafiles are migrated, the controlfile still contains references to the new +DATA locations. We can now copy the controlfile itself to ASM.
Important: This phase requires brief downtime (5-10 minutes).
Step 1: Backup Controlfile Before Migration
-- Take binary backup (optional but recommended)
ALTER DATABASE BACKUP CONTROLFILE TO '/tmp/control_backup.ctl' REUSE;

-- Take trace backup for emergency recreation
ALTER DATABASE BACKUP CONTROLFILE TO TRACE AS '/tmp/create_controlfile.sql';
Step 2: Shutdown and Copy Controlfile
-- Shutdown the database
SHUTDOWN IMMEDIATE;

-- Start in NOMOUNT mode
STARTUP NOMOUNT;
# Connect to RMAN
rman target /
-- Copy controlfile to ASM
-- This uses the actual controlfile from /u02, NOT an RMAN backup
RESTORE CONTROLFILE TO '+DATA' FROM '/u02/oradata/ORCL/control01.ctl';

-- RMAN will output the new ASM filename, like:
-- output file name=+DATA/ORCL/CONTROLFILE/current.256.1234567890
-- COPY THIS FILENAME!

-- If you have multiple controlfiles, copy each:
RESTORE CONTROLFILE TO '+DATA' FROM '/u02/oradata/ORCL/control02.ctl';
-- output file name=+DATA/ORCL/CONTROLFILE/current.257.1234567891

EXIT;
Step 3: Update SPFILE with New Controlfile Locations
-- Back in SQL*Plus, still in NOMOUNT mode

-- Update control_files parameter with the NEW ASM filenames
-- Replace with the ACTUAL filenames returned by RMAN above
ALTER SYSTEM SET control_files=
'+DATA/ORCL/CONTROLFILE/current.256.1234567890',
'+DATA/ORCL/CONTROLFILE/current.257.1234567891'
SCOPE=SPFILE;

-- Note: Using two controlfiles provides redundancy (best practice)
Step 4: Restart with New Controlfiles
-- Restart to use new controlfiles
SHUTDOWN IMMEDIATE;
STARTUP MOUNT;

-- Verify new controlfile locations
SELECT name FROM v$controlfile;
-- Should show +DATA locations

-- Open the database
ALTER DATABASE OPEN;

-- Open all PDBs
ALTER PLUGGABLE DATABASE ALL OPEN;

-- Verify everything is running
SELECT name, open_mode FROM v$database;
SELECT name, open_mode FROM v$pdbs;
Validation: Controlfiles Migrated
-- All controlfiles should be in +DATA
SELECT name FROM v$controlfile;
-- Expected: +DATA/ORCL/CONTROLFILE/current.256.XXXXX
--           +DATA/ORCL/CONTROLFILE/current.257.XXXXX

-- Test database and PDB functionality
ALTER SESSION SET CONTAINER=pdbprod;
SELECT COUNT(*) FROM user_tables;
ALTER SESSION SET CONTAINER=cdb$root;
Phase 3: Migrating Redo Logs to +DATA
Redo logs are CDB-level resources (shared by all PDBs). We use the ADD/DROP method: add new members in ASM, force log switches, then drop old members.
Step 1: Document Current Redo Configuration
-- Check current redo log setup
ALTER SESSION SET CONTAINER=cdb$root;

SET LINESIZE 200
COL member FORMAT A60

SELECT l.group#, l.thread#, l.sequence#, l.bytes/1024/1024 size_mb,
       l.members, l.status, lf.member
FROM v$log l, v$logfile lf
WHERE l.group# = lf.group#
ORDER BY l.group#, lf.member;
Example Output:
GROUP# THREAD# SEQUENCE# SIZE_MB MEMBERS STATUS   MEMBER
------ ------- --------- ------- ------- -------- ----------------------------------
     1       1      1234     200       1 INACTIVE /redo01/redo01.log
     2       1      1235     200       1 INACTIVE /redo02/redo02.log
     3       1      1236     200       1 CURRENT  /redo03/redo03.log
Step 2: Add New Redo Members in ASM
-- Database must be OPEN for this operation

-- Add new member to each group
ALTER DATABASE ADD LOGFILE MEMBER '+DATA' TO GROUP 1;
ALTER DATABASE ADD LOGFILE MEMBER '+DATA' TO GROUP 2;
ALTER DATABASE ADD LOGFILE MEMBER '+DATA' TO GROUP 3;

-- Verify new members added (STATUS will be blank initially)
SELECT group#, member, type, status FROM v$logfile ORDER BY group#;

-- Expected output:
-- GROUP# MEMBER                              TYPE    STATUS
-- ------ ----------------------------------- ------- ------
--      1 /redo01/redo01.log                  ONLINE
--      1 +DATA/ORCL/ONLINELOG/group_1.log    ONLINE
--      2 /redo02/redo02.log                  ONLINE
--      2 +DATA/ORCL/ONLINELOG/group_2.log    ONLINE
--      3 /redo03/redo03.log                  ONLINE
--      3 +DATA/ORCL/ONLINELOG/group_3.log    ONLINE
Step 3: Force Log Switches to Validate ASM Members
-- Switch logs multiple times to ensure:
-- 1. All groups cycle through
-- 2. New ASM members are used and validated
-- 3. Old members become INACTIVE

ALTER SYSTEM SWITCH LOGFILE;
ALTER SYSTEM CHECKPOINT;
-- Wait 10 seconds

ALTER SYSTEM SWITCH LOGFILE;
ALTER SYSTEM CHECKPOINT;
-- Wait 10 seconds

ALTER SYSTEM SWITCH LOGFILE;
ALTER SYSTEM CHECKPOINT;
-- Wait 10 seconds

ALTER SYSTEM SWITCH LOGFILE;
ALTER SYSTEM CHECKPOINT;
-- Wait 10 seconds

-- Check which log is current and status
SELECT l.group#, l.status, lf.member
FROM v$log l, v$logfile lf
WHERE l.group# = lf.group#
ORDER BY l.group#, lf.member;

-- Verify new ASM members have no errors
SELECT group#, member, type, status FROM v$logfile ORDER BY group#;
-- STATUS should be blank (normal) or INVALID would indicate a problem
Critical: Never drop a redo log member if:
- Its status is CURRENT (currently active)
- Its status is ACTIVE (needed for instance recovery)
- You haven’t switched logs multiple times to verify ASM members work
Step 4: Drop Old Redo Members from /redoXX
-- Only drop when you've verified ASM members work properly

ALTER DATABASE DROP LOGFILE MEMBER '/redo01/redo01.log';
ALTER DATABASE DROP LOGFILE MEMBER '/redo02/redo02.log';
ALTER DATABASE DROP LOGFILE MEMBER '/redo03/redo03.log';

-- Verify only ASM members remain
SELECT group#, member FROM v$logfile ORDER BY group#;

-- Expected: Only +DATA members should be listed
Validation: Redo Logs Migrated
-- All redo log members should be in +DATA
SELECT group#, member, type, status FROM v$logfile ORDER BY group#;

-- Check redo log status
SELECT group#, thread#, sequence#, bytes/1024/1024 size_mb,
       members, status, archived
FROM v$log
ORDER BY group#;

-- Force one more switch to confirm everything works
ALTER SYSTEM SWITCH LOGFILE;
ALTER SYSTEM CHECKPOINT;

SELECT group#, status FROM v$log;
Phase 4: Migrating Temp Files to +DATA
Temp files are container-specific (each container has its own). Unlike datafiles, temp files cannot be moved online – they must be recreated.
Identify Current Temp Files
-- Check temp files across all containers
SELECT c.name pdb_name, t.name temp_file,
       ROUND(t.bytes/1024/1024, 2) size_mb
FROM v$tempfile t, v$containers c
WHERE t.con_id = c.con_id
ORDER BY c.name;
Example Output:
PDB_NAME     TEMP_FILE                                      SIZE_MB
------------ ---------------------------------------------- -------
CDB$ROOT     /u02/oradata/ORCL/temp01.dbf                   500.00
PDB$SEED     /u02/oradata/ORCL/pdbseed/temp01.dbf           140.00
PDBPROD      /u02/oradata/ORCL/pdbprod/temp01.dbf         12000.00
Important Note on Temp Tablespace Names
Your environment might use different temp tablespace names:
- CDB$ROOT: Often TEMP_NEW or TEMP
- PDBs: Usually TEMP
Verify your tablespace names:
SELECT tablespace_name, contents
FROM dba_tablespaces
WHERE contents = 'TEMPORARY';
Step 1: Migrate CDB$ROOT Temp File
-- Ensure you're in CDB$ROOT
ALTER SESSION SET CONTAINER=cdb$root;
SHOW CON_NAME;

-- Check your temp tablespace name (TEMP or TEMP_NEW)
SELECT property_value
FROM database_properties
WHERE property_name = 'DEFAULT_TEMP_TABLESPACE';
-- Example output: TEMP_NEW

-- Add new temp file in +DATA
ALTER TABLESPACE temp_new ADD TEMPFILE '+DATA'
  SIZE 500M AUTOEXTEND ON NEXT 100M MAXSIZE 2G;

-- Verify both exist temporarily
SELECT name, bytes/1024/1024 size_mb FROM v$tempfile WHERE con_id = 1;

-- Drop old temp file from /u02
ALTER TABLESPACE temp_new DROP TEMPFILE '/u02/oradata/ORCL/temp01.dbf';

-- Verify only +DATA remains
SELECT name FROM v$tempfile WHERE con_id = 1;
Note: If CDB$ROOT has no temp file initially (rare but possible), just ADD the new one – no DROP needed.
Step 2: Migrate PDB$SEED Temp File
-- Switch to PDB$SEED
ALTER SESSION SET CONTAINER=pdb$seed;
SHOW CON_NAME;

-- Add new temp file in +DATA
ALTER TABLESPACE temp ADD TEMPFILE '+DATA'
  SIZE 150M AUTOEXTEND ON NEXT 50M MAXSIZE 1G;

-- Verify
SELECT file#, name, bytes/1024/1024 size_mb
FROM v$tempfile
WHERE con_id = 2;

-- Drop old temp file
ALTER TABLESPACE temp DROP TEMPFILE '/u02/oradata/ORCL/pdbseed/temp01.dbf';

-- Verify
SELECT name FROM v$tempfile WHERE con_id = 2;

-- Switch back to CDB$ROOT
ALTER SESSION SET CONTAINER=cdb$root;
Step 3: Migrate PDB Temp File
-- Switch to your PDB
ALTER SESSION SET CONTAINER=pdbprod;
SHOW CON_NAME;

-- For large temp files (like your 12GB), size appropriately
ALTER TABLESPACE temp ADD TEMPFILE '+DATA'
  SIZE 1G AUTOEXTEND ON NEXT 500M MAXSIZE 15G;

-- Verify both exist
SELECT file#, name, bytes/1024/1024 size_mb FROM v$tempfile;

-- Drop old temp file
ALTER TABLESPACE temp DROP TEMPFILE '/u02/oradata/ORCL/pdbprod/temp01.dbf';

-- Verify only +DATA remains
SELECT name FROM v$tempfile;

-- Switch back to CDB$ROOT
ALTER SESSION SET CONTAINER=cdb$root;
Validation: All Temp Files Migrated
-- Check all temp files across all containers
SELECT c.name pdb_name, t.name temp_file,
       ROUND(t.bytes/1024/1024, 2) size_mb
FROM v$tempfile t, v$containers c
WHERE t.con_id = c.con_id
ORDER BY c.name;

-- Should only show +DATA locations

-- Verify no temp files on /u02
SELECT name FROM v$tempfile WHERE name LIKE '/u02%';
-- Should return NO ROWS
Why Temp Files Are Safe to Drop Immediately:
- Temp space is session-specific and transient
- No permanent data loss risk
- Sessions automatically use new temp file
- Operations in progress may need to restart, but data is not lost
Phase 5: Configuring Archive Logs to +ARCH
Archive log destination is a simple parameter change. All future archive logs will go to +ARCH.
Step 1: Check Current Archive Configuration
-- Ensure you're in CDB$ROOT
ALTER SESSION SET CONTAINER=cdb$root;

-- Check if archivelog mode is enabled
ARCHIVE LOG LIST;

-- Check current archive destination
SHOW PARAMETER log_archive_dest_1;

-- See recent archive log locations
SELECT name, dest_id, sequence#, first_time
FROM v$archived_log
WHERE dest_id = 1
  AND ROWNUM < 5
ORDER BY sequence# DESC;
Example Output:
NAME                 TYPE        VALUE
-------------------- ----------- ------------------------------------
log_archive_dest_1   string      LOCATION=/u02/oracle/ARCH/oradata

DEST_ID SEQUENCE# FIRST_TIME
------- --------- -------------------
      1       358 2025-12-01 14:30:15
      1       357 2025-12-01 13:45:22
Step 2: Change Archive Destination to +ARCH
-- Change from /u02 to +ARCH
ALTER SYSTEM SET log_archive_dest_1='LOCATION=+ARCH' SCOPE=BOTH;

-- Verify the change
SHOW PARAMETER log_archive_dest_1;
-- Should now show: LOCATION=+ARCH

-- Check archive log list
ARCHIVE LOG LIST;
Step 3: Test Archive Log Generation
-- Force a log switch to generate new archive in +ARCH
ALTER SYSTEM SWITCH LOGFILE;

-- Wait a few seconds, then force archiving
ALTER SYSTEM ARCHIVE LOG CURRENT;

-- Check latest archive logs
SELECT name, sequence#, first_time
FROM v$archived_log
WHERE dest_id = 1
  AND sequence# >= 358  -- Your latest sequence before switch
ORDER BY sequence# DESC;

-- Should show new archives with +ARCH path
Step 4: Verify Archive Destination Health
-- Check +ARCH diskgroup space
SELECT name, state, type, total_mb, free_mb,
       ROUND((total_mb - free_mb), 2) used_mb,
       ROUND(((total_mb - free_mb)/total_mb)*100, 2) pct_used
FROM v$asm_diskgroup
WHERE name = 'ARCH';

-- Verify archive destination status (should be VALID)
SELECT dest_id, dest_name, status, error, destination
FROM v$archive_dest
WHERE dest_id = 1;

-- Expected:
-- DEST_ID DEST_NAME STATUS  ERROR DESTINATION
-- ------- --------- ------- ----- -----------
--       1 LOG_ARCH  VALID         +ARCH
Multiple Log Switches for Confidence
-- Generate several more archives to be sure
ALTER SYSTEM SWITCH LOGFILE;
-- Wait 5 seconds

ALTER SYSTEM SWITCH LOGFILE;
-- Wait 5 seconds

ALTER SYSTEM SWITCH LOGFILE;

-- Check all recent archives are in +ARCH
COL name FORMAT A80
SELECT name, sequence#
FROM v$archived_log
WHERE dest_id = 1
  AND sequence# >= 358
ORDER BY sequence# DESC;
What About Old Archives on /u02?
Old archives on /u02/oracle/ARCH/oradata remain there until you explicitly back them up or delete them. They’re still accessible to RMAN for recovery if needed.
Best Practice: Take a Level 0 backup (which we’ll do in Phase 7), then RMAN can manage archive log cleanup automatically.
Phase 6: Configuring Fast Recovery Area to +FRA
The Fast Recovery Area (FRA) is where Oracle stores backups, archived redo logs (optional), flashback logs, and other recovery-related files.
Step 1: Check Current FRA Configuration
-- Check if FRA is currently configured
SHOW PARAMETER db_recovery_file_dest;

-- Check FRA usage (if configured)
SELECT * FROM v$recovery_file_dest;

-- Check what's stored in FRA
SELECT file_type, percent_space_used, percent_space_reclaimable,
       number_of_files
FROM v$recovery_area_usage;

-- Check +FRA diskgroup availability
SELECT name, state, type, total_mb, free_mb,
       ROUND(usable_file_mb/1024, 2) usable_gb
FROM v$asm_diskgroup
WHERE name = 'FRA';
Example Output:
NAME                       TYPE        VALUE
-------------------------- ----------- ---------------------
db_recovery_file_dest      string      /u02/oracle/FRA/oradata
db_recovery_file_dest_size big integer 200G

NAME                  TOTAL_MB  FREE_MB  USABLE_GB
--------------------- --------- -------- ----------
FRA                    102398    102331      99.93
Step 2: Adjust FRA Size if Needed
Your current FRA might be larger than your +FRA diskgroup capacity. Adjust accordingly:
-- If your +FRA is ~100GB, set FRA size to 80-90GB (leave headroom)
ALTER SYSTEM SET db_recovery_file_dest_size=80G SCOPE=BOTH;

-- Verify
SHOW PARAMETER db_recovery_file_dest_size;
FRA Size Calculation:
FRA Size = (Database Size × 2) + (Archive logs per day × Retention days) + Buffer

For 10GB database:
- Database backups: 10GB × 2 = 20GB
- Archives: 2GB/day × 7 days = 14GB
- Buffer: 20GB
- Total: ~55-60GB minimum

For your environment: 80GB provides comfortable space
Step 3: Change FRA Location to +FRA
-- Change from /u02 to +FRA
ALTER SYSTEM SET db_recovery_file_dest='+FRA' SCOPE=BOTH;

-- Verify both parameters
SHOW PARAMETER db_recovery_file_dest;

-- Expected:
-- db_recovery_file_dest       +FRA
-- db_recovery_file_dest_size  80G
Step 4: Verify FRA Configuration
-- Check new FRA configuration
SELECT * FROM v$recovery_file_dest;

-- Should show:
-- NAME: +FRA
-- SPACE_LIMIT: 85899345920 (80GB in bytes)
-- SPACE_USED: current usage
-- SPACE_RECLAIMABLE: archives that can be deleted after backup

-- Check what will be stored in FRA
SELECT file_type, percent_space_used, percent_space_reclaimable,
       number_of_files
FROM v$recovery_area_usage;
Step 5: Configure RMAN for FRA
# Connect to RMAN
rman target /
-- Check current configuration
RMAN> SHOW ALL;

-- Configure controlfile autobackup to FRA
RMAN> CONFIGURE CONTROLFILE AUTOBACKUP ON;
RMAN> CONFIGURE CONTROLFILE AUTOBACKUP FORMAT FOR DEVICE TYPE DISK TO '+FRA/%F';

-- Configure backup retention policy (keep 2 backup copies)
RMAN> CONFIGURE RETENTION POLICY TO REDUNDANCY 2;

-- Or configure recovery window (keep 7 days of backups)
-- RMAN> CONFIGURE RETENTION POLICY TO RECOVERY WINDOW OF 7 DAYS;

-- Configure archive log deletion policy
-- Only delete archives after they've been backed up
RMAN> CONFIGURE ARCHIVELOG DELETION POLICY TO BACKED UP 1 TIMES TO DISK;

-- Configure backup optimization (skip unchanged files)
RMAN> CONFIGURE BACKUP OPTIMIZATION ON;

-- Configure default device type
RMAN> CONFIGURE DEFAULT DEVICE TYPE TO DISK;

-- Show final configuration
RMAN> SHOW ALL;

RMAN> EXIT;
Step 6: Test FRA with Small Backup
rman target /
-- Take a small test backup to verify FRA works
RMAN> BACKUP CURRENT CONTROLFILE;

-- List backups to confirm it went to +FRA
RMAN> LIST BACKUP SUMMARY;

-- Should show backup in +FRA

RMAN> EXIT;
-- Back in SQL*Plus, verify backup went to +FRA
SELECT * FROM v$recovery_area_usage;

-- Should show CONTROL FILE or BACKUP PIECE with files now
-- Example:
-- FILE_TYPE        PERCENT_SPACE_USED  NUMBER_OF_FILES
-- ---------------- ------------------- ---------------
-- CONTROL FILE                   0.09               1
-- BACKUP PIECE                   0.05               1
Understanding What Goes Where
+DATA (Primary database files):
- ✅ Datafiles
- ✅ Controlfiles
- ✅ Redo logs
- ✅ Temp files
+ARCH (Archive logs only):
- ✅ Archive logs (from log_archive_dest_1)
+FRA (Recovery-related files):
- ✅ RMAN backups (full, incremental, datafile copies)
- ✅ Controlfile autobackups
- ✅ Flashback logs (if flashback database enabled)
- ✅ Can also store archive logs as secondary location (optional)
Post-Migration Validation and Backup
Complete System Validation
-- 1. Verify all parameters
SELECT 'Archive Destination' parameter_name, value
FROM v$parameter WHERE name = 'log_archive_dest_1'
UNION ALL
SELECT 'FRA Location', value
FROM v$parameter WHERE name = 'db_recovery_file_dest'
UNION ALL
SELECT 'FRA Size', value
FROM v$parameter WHERE name = 'db_recovery_file_dest_size'
UNION ALL
SELECT 'SPFILE Location', value
FROM v$parameter WHERE name = 'spfile';

-- 2. Verify all datafiles in ASM
SELECT c.name container, d.name datafile_location
FROM v$datafile d, v$containers c
WHERE d.con_id = c.con_id
ORDER BY c.name, d.file#;

-- 3. Verify controlfiles in ASM
SELECT name FROM v$controlfile;

-- 4. Verify redo logs in ASM
SELECT group#, member FROM v$logfile ORDER BY group#;

-- 5. Verify temp files in ASM
SELECT c.name container, t.name tempfile_location
FROM v$tempfile t, v$containers c
WHERE t.con_id = c.con_id
ORDER BY c.name;

-- 6. Check database and all PDBs are open
SELECT name, open_mode FROM v$database;
SELECT name, open_mode FROM v$pdbs;

-- 7. ASM diskgroup usage summary
SELECT name diskgroup,
       ROUND(total_mb/1024, 2) total_gb,
       ROUND((total_mb - free_mb)/1024, 2) used_gb,
       ROUND(free_mb/1024, 2) free_gb,
       ROUND(((total_mb - free_mb) / total_mb) * 100, 2) pct_used
FROM v$asm_diskgroup
ORDER BY name;
Take Level 0 Backup
Now that everything is in ASM, take a fresh Level 0 backup. This creates a clean baseline and makes old backups/archives obsolete.
rman target /
-- Full Level 0 backup with archive logs
-- DELETE INPUT removes backed-up archive logs from +ARCH and /u02
RMAN> BACKUP INCREMENTAL LEVEL 0 DATABASE PLUS ARCHIVELOG DELETE INPUT;

-- This will:
-- 1. Back up all archive logs (including old /u02 ones if still there)
-- 2. Take Level 0 backup of entire CDB and all PDBs
-- 3. Back up current controlfile
-- 4. DELETE INPUT removes backed-up archive logs automatically

-- Monitor progress (from another SQL*Plus session)
-- SELECT sid, serial#, context, sofar, totalwork,
--        ROUND(sofar/totalwork*100,2) pct_complete
-- FROM v$session_longops
-- WHERE opname LIKE '%RMAN%' AND totalwork != 0;

-- After completion, verify
RMAN> LIST BACKUP SUMMARY;

-- Validate the backup
RMAN> LIST BACKUP OF DATABASE;
RMAN> LIST BACKUP OF ARCHIVELOG ALL;

-- Check for any backup failures
RMAN> LIST BACKUP SUMMARY;

RMAN> EXIT;
Post-Backup FRA Usage
-- Check FRA usage after backup
SELECT
  name,
  ROUND(space_limit/1024/1024/1024, 2) space_limit_gb,
  ROUND(space_used/1024/1024/1024, 2) space_used_gb,
  ROUND((space_limit - space_used)/1024/1024/1024, 2) available_gb,
  ROUND((space_used/space_limit)*100, 2) pct_used
FROM v$recovery_file_dest;

-- Check what's in FRA by file type
SELECT file_type,
       ROUND(percent_space_used, 2) pct_used,
       number_of_files
FROM v$recovery_area_usage
WHERE number_of_files > 0
ORDER BY percent_space_used DESC;

-- Expected to see:
-- BACKUP PIECE    10-20%    (your Level 0 backup)
-- CONTROL FILE     <1%      (controlfile autobackup)
-- ARCHIVED LOG     <1%      (if any remain after DELETE INPUT)
Cleanup Old Files on /u02
Only after verifying backup is successful:
# 1. Verify backup is good first
rman target /
RMAN> VALIDATE BACKUPSET <backup_key>;
RMAN> EXIT;

# 2. Verify database is running normally
sqlplus / as sysdba
SELECT name, open_mode FROM v$database;
SELECT name, open_mode FROM v$pdbs;

# 3. Clean up old files (BE CAREFUL!)
# Datafiles
rm -f /u02/oradata/ORCL/*.dbf
rm -f /u02/oradata/ORCL/pdbseed/*.dbf
rm -f /u02/oradata/ORCL/pdbprod/*.dbf

# Controlfiles
rm -f /u02/oradata/ORCL/*.ctl

# Redo logs (if not already cleaned by OS)
rm -f /redo01/*.log
rm -f /redo02/*.log
rm -f /redo03/*.log

# Temp files
rm -f /u02/oradata/ORCL/temp*.dbf
rm -f /u02/oradata/ORCL/pdbseed/temp*.dbf
rm -f /u02/oradata/ORCL/pdbprod/temp*.dbf

# Archive logs (RMAN already deleted these with DELETE INPUT)
# But if any remain:
rm -rf /u02/oracle/ARCH/oradata/*

# Old FRA backups (after confirming new backups work)
rm -rf /u02/oracle/FRA/oradata/*
Update Oracle Restart Configuration
# If you moved SPFILE to ASM (optional), update Oracle Restart
# srvctl modify database -d ORCL -spfile '+DATA/ORCL/PARAMETERFILE/spfile.ora'

# Verify Oracle Restart configuration
srvctl config database -d ORCL

# Should show:
# Database name: ORCL
# Oracle home: /u01/app/oracle/product/19.0.0/dbhome_1
# Oracle user: oracle
# Spfile: /u01/app/oracle/product/19.0.0/dbhome_1/dbs/spfileORCL.ora (or +DATA if moved)
# Domain:
# Start options: open
# Stop options: immediate
Troubleshooting Common Issues
Issue 1: ORA-01565 “Datafile not found”
Symptom: After controlfile migration, database won’t open with error about missing datafiles.
Cause: Controlfile has old locations, not updated with new ASM paths.
Solution:
-- Use the backup controlfile from before migration
STARTUP NOMOUNT;
RESTORE CONTROLFILE FROM '/tmp/control_backup.ctl';
ALTER DATABASE MOUNT;

-- Now verify datafile locations
SELECT name FROM v$datafile;

-- If still showing old locations, you need to re-move them
-- or restore from backup and start over
Issue 2: ORA-19504 “Failed to create file”
Symptom: Cannot create files in ASM diskgroup.
Cause: Insufficient space or diskgroup not mounted.
Solution:
-- Check ASM diskgroup status
SELECT name, state, total_mb, free_mb FROM v$asm_diskgroup;

-- If not MOUNTED:
ALTER DISKGROUP data MOUNT;

-- If insufficient space:
-- Add more disks to diskgroup or clean up old files
Issue 3: ORA-25153 “Temporary Tablespace is Empty”
Symptom: Operations requiring temp space fail after temp file migration.
Cause: All temp files were dropped, none remain.
Solution:
-- Add temp file immediately
ALTER TABLESPACE temp ADD TEMPFILE '+DATA' SIZE 500M AUTOEXTEND ON;

-- Verify
SELECT name FROM v$tempfile;
Issue 4: Archive Log Destination Full
Symptom: Database hangs, alert log shows “unable to allocate archive log”.
Cause: +ARCH diskgroup is full.
Solution:
-- Check space
SELECT name, total_mb, free_mb FROM v$asm_diskgroup WHERE name = 'ARCH';

-- Back up and delete old archives
rman target /
RMAN> BACKUP ARCHIVELOG ALL DELETE INPUT;
RMAN> EXIT;
Issue 5: Redo Log Group INVALID Status
Symptom: After adding redo log members, some show STATUS=INVALID.
Cause: File creation failed or permissions issue.
Solution:
-- Check exact error
SELECT group#, member, type, status FROM v$logfile;

-- Drop invalid member
ALTER DATABASE DROP LOGFILE MEMBER '<invalid_member>';

-- Recreate it
ALTER DATABASE ADD LOGFILE MEMBER '+DATA' TO GROUP <group#>;

-- Force log switch to test
ALTER SYSTEM SWITCH LOGFILE;
Issue 6: RMAN Backup Fails to FRA
Symptom: RMAN backup fails with “unable to write to FRA”.
Cause: FRA not configured properly or diskgroup issues.
Solution:
-- Verify FRA parameters
SHOW PARAMETER db_recovery_file_dest;

-- Check FRA status
SELECT * FROM v$recovery_file_dest;

-- If FRA is full, clean up obsolete backups
rman target /
RMAN> DELETE OBSOLETE;
RMAN> EXIT;
Best Practices and Lessons Learned
1. Always Back Up Before Migration
Take a fresh RMAN backup before starting any migration:
RMAN> BACKUP DATABASE PLUS ARCHIVELOG;
RMAN> BACKUP CURRENT CONTROLFILE FORMAT '/backup/controlfile_%U.bkp';
This gives you a rollback point if anything goes wrong.
2. Migrate in Phases with Validation
Don’t rush through all components at once. Complete one phase, validate, then move to the next:
- Datafiles → Validate
- Controlfiles → Validate
- Redo logs → Validate
- Temp files → Validate
- Archive/FRA → Validate
3. Use Descriptive ASM Filenames (Optional)
Instead of letting ASM auto-generate names, you can specify:
-- Instead of:
ALTER DATABASE MOVE DATAFILE '/u02/system01.dbf' TO '+DATA';
-- Which creates: +DATA/ORCL/DATAFILE/system.256.xxxxx

-- Use:
ALTER DATABASE MOVE DATAFILE '/u02/system01.dbf' TO '+DATA/ORCL/DATAFILE/system01.dbf';
-- Creates more readable name
However, ASM’s auto-generated names are perfectly fine and often preferred.
4. Monitor ASM Diskgroup Space
Set up proactive monitoring:
-- Create a monitoring script
SELECT name,
       ROUND((total_mb - free_mb)/total_mb * 100, 2) pct_used,
       CASE
         WHEN (total_mb - free_mb)/total_mb * 100 > 90 THEN 'CRITICAL'
         WHEN (total_mb - free_mb)/total_mb * 100 > 80 THEN 'WARNING'
         ELSE 'OK'
       END status
FROM v$asm_diskgroup;
Schedule this to run daily via cron and alert if space exceeds 80%.
5. Implement Proper Backup Retention
Configure RMAN retention policy appropriately:
rman target /

# For production databases
RMAN> CONFIGURE RETENTION POLICY TO RECOVERY WINDOW OF 7 DAYS;

# Or use redundancy
RMAN> CONFIGURE RETENTION POLICY TO REDUNDANCY 2;

# Delete obsolete backups regularly
RMAN> DELETE OBSOLETE;
6. Document Your Configuration
After migration, document your ASM layout:
-- Generate configuration report
SPOOL /tmp/asm_config_report.txt

SELECT 'Database Files' section FROM dual;
SELECT c.name, d.name FROM v$datafile d, v$containers c WHERE d.con_id = c.con_id;

SELECT 'Control Files' section FROM dual;
SELECT name FROM v$controlfile;

SELECT 'Redo Logs' section FROM dual;
SELECT group#, member FROM v$logfile;

SELECT 'Temp Files' section FROM dual;
SELECT c.name, t.name FROM v$tempfile t, v$containers c WHERE t.con_id = c.con_id;

SELECT 'Archive Config' section FROM dual;
SHOW PARAMETER log_archive_dest_1;

SELECT 'FRA Config' section FROM dual;
SHOW PARAMETER db_recovery_file_dest;

SELECT 'Diskgroup Usage' section FROM dual;
SELECT name, state, total_mb, free_mb FROM v$asm_diskgroup;

SPOOL OFF
Keep this documentation updated.
7. Test Recovery Procedures
After migration, verify you can actually restore:
rman target /

# Validate all backups
RMAN> VALIDATE BACKUPSET <key>;

# Test restore (without actually restoring)
RMAN> RESTORE DATABASE VALIDATE;
RMAN> RESTORE ARCHIVELOG ALL VALIDATE;

# For PDB, test PDB restore
RMAN> RESTORE PLUGGABLE DATABASE pdbprod VALIDATE;
8. CDB/PDB-Specific Considerations
Key lessons for CDB/PDB environments:
- Different temp tablespace names: CDB$ROOT might use TEMP_NEW while PDBs use TEMP
- PDB$SEED must be READ ONLY: Always reopen it in READ ONLY mode after changes
- Close PDBs before datafile moves: Prevents active transaction issues
- Test PDB connectivity: After migration, verify each PDB is functional
- RMAN backup includes all PDBs: Level 0 backup captures CDB and all PDBs automatically
9. Performance Considerations
During migration:
- Each MOVE DATAFILE operation locks the file briefly during switch
- Plan migrations during low-activity windows if possible
- Redo logs can be migrated online with no user impact
- Temp files cause temporary loss of temp space during recreation
After migration:
- ASM stripe and mirror configuration affects I/O performance
- Monitor for any performance regressions
- Consider using EXTERNAL redundancy for better performance (if storage has its own RAID)
- Use Normal or High redundancy for ASM-managed redundancy
10. Automation for Future Migrations
Create a reusable script framework:
#!/bin/bash
# asm_migration_master.sh

# Phase 1: Pre-flight checks
./01_preflight_checks.sh

# Phase 2: Datafiles
./02_migrate_datafiles.sh

# Phase 3: Controlfiles
./03_migrate_controlfiles.sh

# Phase 4: Redo logs
./04_migrate_redologs.sh

# Phase 5: Temp files
./05_migrate_tempfiles.sh

# Phase 6: Archive/FRA
./06_configure_arch_fra.sh

# Phase 7: Validation
./07_validate_migration.sh

# Phase 8: Backup
./08_level0_backup.sh
This makes future migrations repeatable and less error-prone.
11. Choosing the Right Method for Future Migrations
Every migration is different. Before your next ASM migration, evaluate:
Environment Factors:
- Oracle version (12c+ enables ALTER DATABASE MOVE)
- Database size (small vs. large impacts method choice)
- Downtime tolerance (business requirements)
- Storage capacity (do you have space for temporary copies?)
- Team expertise (RMAN knowledge vs. SQL-only)
Quick Decision Tree:
Is it Oracle 12c or later?
├─ YES → Can you tolerate seconds of downtime per file?
│   ├─ YES → Use ALTER DATABASE MOVE DATAFILE ✅
│   └─ NO → Use RMAN BACKUP AS COPY (minimal downtime)
└─ NO (11g or earlier) → Use RMAN BACKUP AS COPY or BACKUP/RESTORE

Is database very large (500GB+)?
├─ YES → RMAN BACKUP AS COPY (use parallel channels)
└─ NO → ALTER DATABASE MOVE works fine

Need to reorganize database structure?
├─ YES → Consider Data Pump (combine migration with cleanup)
└─ NO → Use faster methods (MOVE or RMAN)
Real-World Scenarios:
Scenario 1: Oracle 11g, 200GB, production
- Best Method: RMAN BACKUP AS COPY
- Reason: 11g doesn’t have ALTER DATABASE MOVE, need parallel copy for speed
- Downtime: 10-15 minutes for SWITCH operation
Scenario 2: Oracle 19c CDB/PDB, 2TB, 24/7 production
- Best Method: ALTER DATABASE MOVE per PDB (staged)
- Reason: Online operation, migrate one PDB at a time during off-hours
- Downtime: None (just performance impact during copy)
Scenario 3: Oracle 12c, 50GB, testing environment
- Best Method: RMAN BACKUP/RESTORE
- Reason: Downtime acceptable, want fresh clean database
- Downtime: 2-3 hours
Scenario 4: Oracle 19c, 10GB, upgrading to 21c
- Best Method: Data Pump + new 21c database on ASM
- Reason: Combine storage migration with version upgrade
- Downtime: 4-6 hours
The method we used (ALTER DATABASE MOVE) was perfect for our Oracle 19c, 10GB, CDB/PDB scenario with minimal downtime requirements. Your situation might call for a different approach – now you have the knowledge to choose wisely!
Conclusion
Migrating an Oracle 19c database from local storage to ASM is a significant undertaking, but with proper planning and the right method selection, it can be accomplished with minimal risk and downtime. In our case, we chose the ALTER DATABASE MOVE DATAFILE approach for its simplicity and minimal disruption, successfully migrating a 10GB CDB with one PDB from local storage to ASM diskgroups.
Key Takeaways
What We Accomplished: ✅ Migrated 100% of database files to ASM storage (+DATA, +ARCH, +FRA)
✅ Used online migration where possible (datafiles, redo logs)
✅ Minimal downtime (5-10 minutes for controlfile migration only)
✅ No data loss or corruption
✅ Established clean backup baseline with Level 0 backup
✅ Improved storage management and I/O performance
Migration Timeline (10GB Database):
- Datafiles (CDB + PDBs): 15-20 minutes
- Controlfiles: 5-10 minutes (downtime)
- Redo logs: 10 minutes
- Temp files: 5 minutes
- Archive/FRA configuration: 5 minutes
- Validation + Level 0 backup: 30-45 minutes
- Total: ~90-120 minutes
Benefits Realized
Operational Benefits:
- Simplified storage management (no more LVM/filesystem management)
- Automatic I/O load balancing across disks
- Better integration with Oracle Restart
- Centralized backup and recovery management
- Easier capacity expansion (just add disks to diskgroups)
Performance Benefits:
- ASM stripe and mirror optimization
- Better I/O distribution
- Reduced storage fragmentation
- Improved redo log performance
Reliability Benefits:
- ASM redundancy options (Normal, High, External)
- Automatic rebalancing on disk failure
- Better integration with Oracle features (Data Guard, RMAN, etc.)
- Reduced dependency on OS-level storage
Related Articles
- Oracle ASM 19c Installation: Complete Guide
- Response File for Oracle ASM Standalone
- ASMSNMP User Setup: Complete Oracle ASM Monitoring Guide
- Oracle Database Memory Monitoring Guide
Next Steps
After completing your ASM migration:
- Implement Monitoring: Set up ASM diskgroup space monitoring and alerting
- Schedule Regular Backups: Establish incremental backup schedule (daily Level 1, weekly Level 0)
- Test Recovery: Perform test restores to verify backup integrity
- Document Configuration: Maintain up-to-date documentation of your ASM layout
- Plan Capacity: Monitor growth trends and plan diskgroup expansion
- Consider Data Guard: If high availability is needed, implement Data Guard with ASM
Share Your Experience
Have you performed a similar migration? What challenges did you face? Share your experience in the comments below – it helps the community learn from real-world scenarios!
Need Help?
If you’re planning an ASM migration or running into issues, feel free to reach out via the comments. I’m happy to help fellow DBAs navigate this process.
This blog post documents a real production migration performed in December 2025. All commands and outputs are from actual implementation. Your environment may have different configurations, so always test procedures in a non-production environment first.
3 thoughts on “Migrating Oracle 19c Database from Local Storage to ASM: A Complete Step-by-Step Guide”