The Problem: TNS-12541 and Database Connection Failures
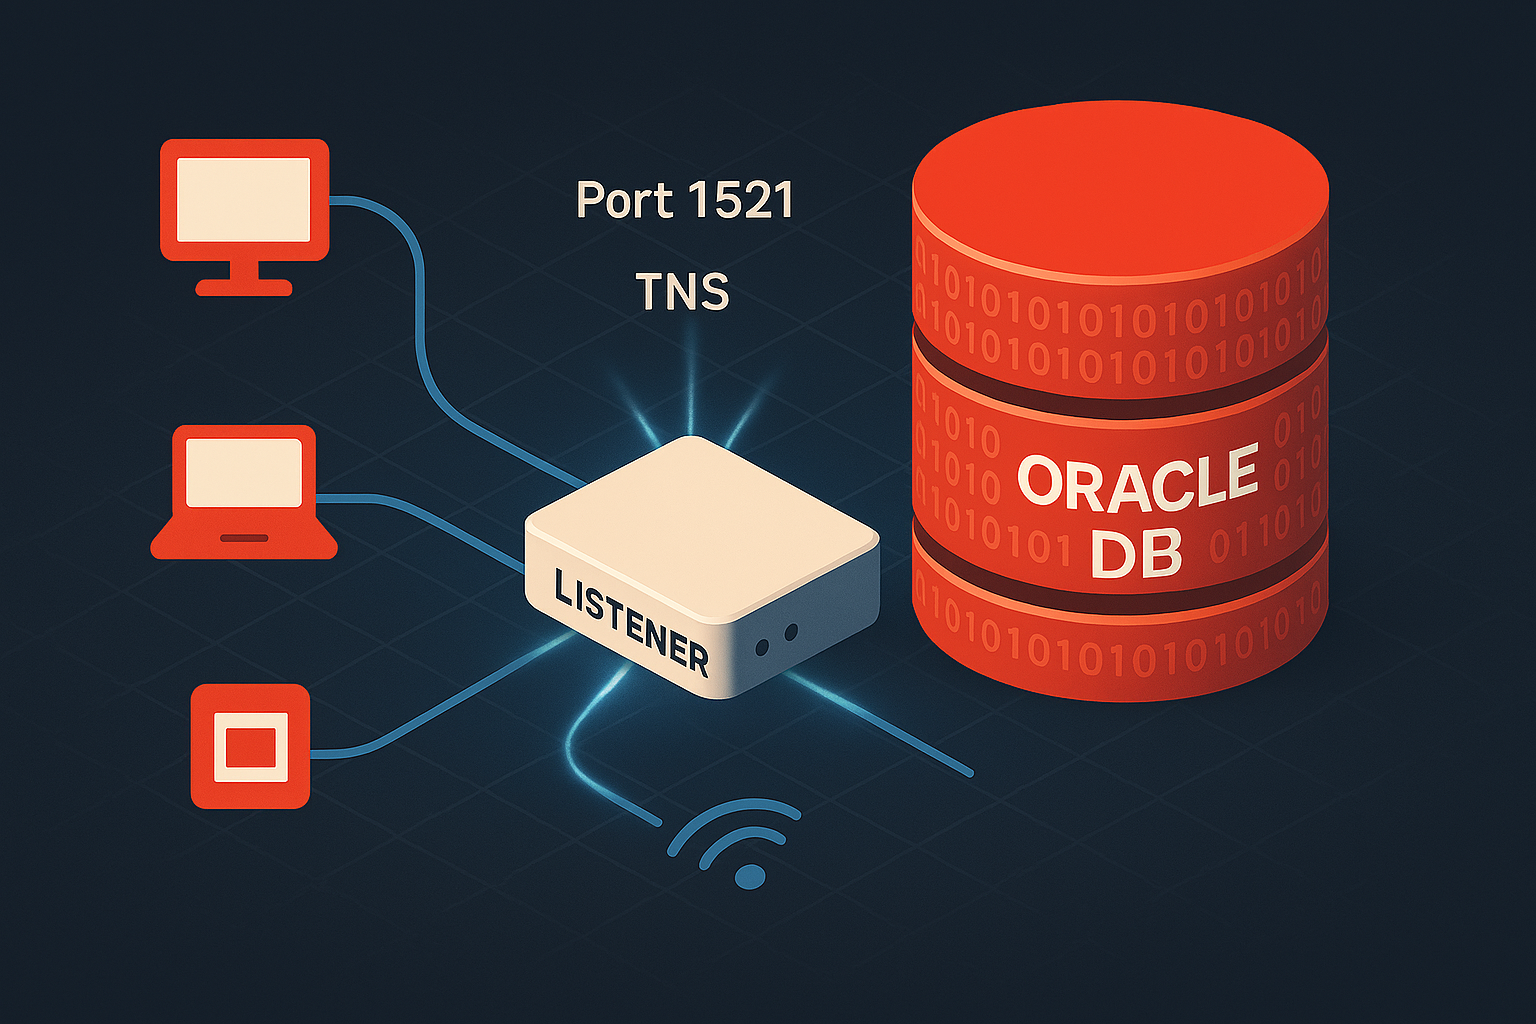
You’ve just installed Oracle 19c on your server. The database is up and running perfectly—you can connect locally using SQL*Plus without any issues. But the moment you try connecting from a remote application or another server, you’re hit with the dreaded TNS-12541: TNS:no listener error.
Sound familiar? This is one of the most common issues DBAs face after a fresh Oracle installation or database creation. The database instance is operational, but without a properly configured listener, it’s invisible to the outside world. Your application teams are waiting, production timelines are tight, and you need to get this resolved—fast.
In this guide, I’ll walk you through the complete process of configuring an Oracle listener for a standalone single instance database (non-ASM environment). We’ll use a practical example with hostname santest and database SID cdbsantst to demonstrate every step.
Prerequisites
Before we begin, ensure you have:
- Oracle Database installed and running
- ORACLE_HOME and ORACLE_BASE environment variables set
- Root or oracle user access to the server
- Database already created and accessible via local SQL*Plus
Environment Details for This Guide:
- Hostname:
santest - Database SID:
cdbsantst - Listener Port:
1521(default) - Oracle Version: 19c (applicable to 11g, 12c, 18c, 19c, 21c, 23c)
Step 1: Verify Database Status
First, confirm your database is running:
$ export ORACLE_SID=cdbsantst
$ sqlplus / as sysdba

SQL> SELECT instance_name, status, database_role FROM v$instance, v$database;

INSTANCE_NAME    STATUS       DATABASE_ROLE
---------------- ------------ ----------------
cdbsantst        OPEN         PRIMARY
If the database is not open, start it:
SQL> STARTUP;
Step 2: Check Current Listener Status
Check if a listener is already running:
$ lsnrctl status

TNS-12541: TNS:no listener
If you see this error, it means no listener is configured or running. That’s what we’re about to fix.
Step 3: Create listener.ora Configuration File
The listener configuration file is located at $ORACLE_HOME/network/admin/listener.ora.
Create or edit the file:
$ cd $ORACLE_HOME/network/admin
$ vi listener.ora
Add the following configuration:
# Listener Configuration for cdbsantst
LISTENER =
  (DESCRIPTION_LIST =
    (DESCRIPTION =
      (ADDRESS = (PROTOCOL = TCP)(HOST = santest)(PORT = 1521))
      (ADDRESS = (PROTOCOL = IPC)(KEY = EXTPROC1521))
    )
  )

# Static Service Registration (Optional but recommended for startup reliability)
SID_LIST_LISTENER =
  (SID_LIST =
    (SID_DESC =
      (GLOBAL_DBNAME = cdbsantst)
      (ORACLE_HOME = /u01/app/oracle/product/19.0.0/dbhome_1)
      (SID_NAME = cdbsantst)
    )
  )

# Listener Logging Directory
ADR_BASE_LISTENER = /u01/app/oracle
Configuration Breakdown:
- LISTENER: Defines the listener name and listening addresses
- HOST = santest: Your server hostname (use fully qualified domain name in production)
- PORT = 1521: Default Oracle listener port
- IPC: For local inter-process communication
- SID_LIST_LISTENER: Static registration ensures the listener knows about your database even before dynamic registration occurs
- GLOBAL_DBNAME: Should match your database’s DB_UNIQUE_NAME
- ORACLE_HOME: Path to your Oracle installation
- SID_NAME: Your database instance identifier
- ADR_BASE_LISTENER: Directory for listener logs
Step 4: Create tnsnames.ora for Client Connections
Create or edit $ORACLE_HOME/network/admin/tnsnames.ora:
$ vi $ORACLE_HOME/network/admin/tnsnames.ora
Add the TNS entry:
CDBSANTST =
  (DESCRIPTION =
    (ADDRESS = (PROTOCOL = TCP)(HOST = santest)(PORT = 1521))
    (CONNECT_DATA =
      (SERVER = DEDICATED)
      (SERVICE_NAME = cdbsantst)
    )
  )
This allows you to connect using the alias CDBSANTST instead of typing the full connection string.
Step 5: Set Proper File Permissions
Ensure the configuration files have correct ownership:
$ cd $ORACLE_HOME/network/admin
$ chown oracle:oinstall listener.ora tnsnames.ora
$ chmod 644 listener.ora tnsnames.ora
Step 6: Start the Listener
Start the listener using the listener control utility:
$ lsnrctl start

LSNRCTL for Linux: Version 19.0.0.0.0 - Production on 10-DEC-2025 14:30:22

Copyright (c) 1991, 2019, Oracle.  All rights reserved.

Starting /u01/app/oracle/product/19.0.0/dbhome_1/bin/tnslsnr: please wait...

TNSLSNR for Linux: Version 19.0.0.0.0 - Production
System parameter file is /u01/app/oracle/product/19.0.0/dbhome_1/network/admin/listener.ora
Log messages written to /u01/app/oracle/diag/tnslsnr/santest/listener/alert/log.xml
Listening on: (DESCRIPTION=(ADDRESS=(PROTOCOL=tcp)(HOST=santest)(PORT=1521)))
Listening on: (DESCRIPTION=(ADDRESS=(PROTOCOL=ipc)(KEY=EXTPROC1521)))

Connecting to (DESCRIPTION=(ADDRESS=(PROTOCOL=TCP)(HOST=santest)(PORT=1521)))
STATUS of the LISTENER
------------------------
Alias                     LISTENER
Version                   TNSLSNR for Linux: Version 19.0.0.0.0 - Production
Start Date                10-DEC-2025 14:30:22
Uptime                    0 days 0 hr. 0 min. 0 sec
Trace Level               off
Security                  ON: Local OS Authentication
SNMP                      OFF
Listener Parameter File   /u01/app/oracle/product/19.0.0/dbhome_1/network/admin/listener.ora
Listener Log File         /u01/app/oracle/diag/tnslsnr/santest/listener/alert/log.xml
Listening Endpoints Summary...
  (DESCRIPTION=(ADDRESS=(PROTOCOL=tcp)(HOST=santest)(PORT=1521)))
  (DESCRIPTION=(ADDRESS=(PROTOCOL=ipc)(KEY=EXTPROC1521)))
Services Summary...
Service "cdbsantst" has 1 instance(s).
  Instance "cdbsantst", status UNKNOWN, has 1 handler(s) for this service...
The command completed successfully
Notice: The service shows status UNKNOWN initially because the database hasn’t dynamically registered yet.
Step 7: Register Database with Listener
Force immediate database registration with the listener:
$ sqlplus / as sysdba

SQL> ALTER SYSTEM REGISTER;

System altered.

SQL> EXIT;
This command forces the PMON process to register the database with the listener immediately instead of waiting for the automatic 60-second registration cycle.
Step 8: Verify Listener Configuration
Check the listener status again:
$ lsnrctl status

STATUS of the LISTENER
------------------------
Alias                     LISTENER
Version                   TNSLSNR for Linux: Version 19.0.0.0.0 - Production
Start Date                10-DEC-2025 14:30:22
Uptime                    0 days 0 hr. 5 min. 12 sec
Trace Level               off
Security                  ON: Local OS Authentication
SNMP                      OFF
Listener Parameter File   /u01/app/oracle/product/19.0.0/dbhome_1/network/admin/listener.ora
Listener Log File         /u01/app/oracle/diag/tnslsnr/santest/listener/alert/log.xml
Listening Endpoints Summary...
  (DESCRIPTION=(ADDRESS=(PROTOCOL=tcp)(HOST=santest)(PORT=1521)))
  (DESCRIPTION=(ADDRESS=(PROTOCOL=ipc)(KEY=EXTPROC1521)))
Services Summary...
Service "cdbsantst" has 1 instance(s).
  Instance "cdbsantst", status READY, has 1 handler(s) for this service...
The command completed successfully
Now the status shows READY instead of UNKNOWN, indicating successful dynamic registration.
Step 9: Test Connectivity
Test 1: TNS Ping
$ tnsping CDBSANTST

TNS Ping Utility for Linux: Version 19.0.0.0.0 - Production on 10-DEC-2025 14:35:00

Copyright (c) 1997, 2019, Oracle.  All rights reserved.

Used parameter files:
/u01/app/oracle/product/19.0.0/dbhome_1/network/admin/sqlnet.ora

Used TNSNAMES adapter to resolve the alias
Attempting to contact (DESCRIPTION = (ADDRESS = (PROTOCOL = TCP)(HOST = santest)(PORT = 1521)) (CONNECT_DATA = (SERVER = DEDICATED) (SERVICE_NAME = cdbsantst)))
OK (10 msec)
Test 2: SQL*Plus Connection
$ sqlplus system/password@CDBSANTST

SQL*Plus: Release 19.0.0.0.0 - Production on Wed Dec 10 14:36:00 2025
Version 19.3.0.0.0

Copyright (c) 1982, 2019, Oracle.  All rights reserved.

Connected to:
Oracle Database 19c Enterprise Edition Release 19.0.0.0.0 - Production
Version 19.3.0.0.0

SQL> SELECT instance_name FROM v$instance;

INSTANCE_NAME
----------------
cdbsantst

SQL> EXIT;
Success! You can now connect to the database remotely.
Step 10: Enable Listener Auto-Start on Boot (Optional)
To ensure the listener starts automatically after server reboot:
For systemd-based systems (RHEL 7+, OEL 7+):
Create a systemd service file:
$ sudo vi /etc/systemd/system/oracle-listener.service
Add the following content:
[Unit]
Description=Oracle Net Listener
After=network.target

[Service]
Type=forking
User=oracle
Group=oinstall
Environment=ORACLE_HOME=/u01/app/oracle/product/19.0.0/dbhome_1
Environment=ORACLE_SID=cdbsantst
ExecStart=/u01/app/oracle/product/19.0.0/dbhome_1/bin/lsnrctl start
ExecStop=/u01/app/oracle/product/19.0.0/dbhome_1/bin/lsnrctl stop
RemainAfterExit=yes

[Install]
WantedBy=multi-user.target
Enable and start the service:
$ sudo systemctl daemon-reload
$ sudo systemctl enable oracle-listener
$ sudo systemctl start oracle-listener
$ sudo systemctl status oracle-listener
Common Listener Issues and Troubleshooting
Issue 1: TNS-12541: TNS:no listener
Symptoms:
ORA-12541: TNS:no listener
Causes and Solutions:
- Listener not started: Run
lsnrctl start - Wrong hostname in listener.ora: Verify
HOSTmatches actual hostname or use0.0.0.0for all interfaces - Firewall blocking port 1521: Check with
netstat -tuln | grep 1521and configure firewall
# For firewalld (RHEL 7+)
$ sudo firewall-cmd --permanent --add-port=1521/tcp
$ sudo firewall-cmd --reload
Issue 2: TNS-12514: TNS:listener does not currently know of service
Symptoms:
ORA-12514: TNS:listener does not currently know of service requested in connect descriptor
Causes and Solutions:
- Database not registered: Run
ALTER SYSTEM REGISTER; - SERVICE_NAME mismatch: Verify with
SELECT value FROM v$parameter WHERE name='service_names'; - LOCAL_LISTENER not set:
SQL> ALTER SYSTEM SET LOCAL_LISTENER='(ADDRESS=(PROTOCOL=TCP)(HOST=santest)(PORT=1521))' SCOPE=BOTH;
SQL> ALTER SYSTEM REGISTER;
Issue 3: TNS-12505: TNS:listener does not currently know of SID
Symptoms:
ORA-12505: TNS:listener does not currently know of SID given in connect descriptor
Solution: Either use SERVICE_NAME instead of SID in tnsnames.ora, or add static registration in listener.ora (as shown in Step 3).
Issue 4: Listener shows STATUS BLOCKED
Symptoms:
The listener supports no services
Solution: Check if another listener is already running on port 1521:
$ ps -ef | grep tnslsnr
$ lsnrctl status LISTENER
$ netstat -tuln | grep 1521
Kill conflicting processes and restart.
Issue 5: Dynamic Registration Not Working
Check these parameters:
SQL> SHOW PARAMETER local_listener;
SQL> SHOW PARAMETER service_names;
SQL> SHOW PARAMETER instance_name;

-- Set if needed:
SQL> ALTER SYSTEM SET LOCAL_LISTENER='LISTENER' SCOPE=BOTH;
SQL> ALTER SYSTEM REGISTER;
Best Practices for Production Environments
- Use Fully Qualified Domain Names (FQDN): Replace
HOST = santestwithHOST = santest.yourdomain.com - Enable Listener Logging and Tracing:
$ lsnrctl
LSNRCTL> SET LOG_STATUS ON
LSNRCTL> SET TRC_LEVEL SUPPORT
- Secure Your Listener: Set password to prevent unauthorized administration
$ lsnrctl
LSNRCTL> CHANGE_PASSWORD
Old password: <press Enter>
New password: <your_password>
LSNRCTL> SAVE_CONFIG
- Monitor Listener Health:
$ lsnrctl services
$ lsnrctl status
$ tail -f $ORACLE_BASE/diag/tnslsnr/santest/listener/trace/listener.log
- Document Your Configuration: Keep a record of all custom settings, especially LOCAL_LISTENER parameters
Quick Reference Commands
# Start listener
lsnrctl start

# Stop listener
lsnrctl stop

# Check status
lsnrctl status

# Reload configuration without stopping
lsnrctl reload

# View all services
lsnrctl services

# Test connectivity
tnsping CDBSANTST

# Force database registration
sqlplus / as sysdba
SQL> ALTER SYSTEM REGISTER;

# Check listener log
tail -f $ORACLE_BASE/diag/tnslsnr/$(hostname)/listener/trace/listener.log
Conclusion
Configuring an Oracle listener for a standalone database is straightforward when you follow the proper steps. The key is ensuring that:
- Your listener.ora contains the correct hostname and port
- The database is properly registered (dynamically or statically)
- Your tnsnames.ora has the correct service configuration
- Firewall rules allow traffic on port 1521
With the listener properly configured, your database on santest with SID cdbsantst is now accessible to remote clients and applications. This same configuration approach applies whether you’re running Oracle 11g, 12c, 18c, 19c, 21c, or 23c.
If you continue to experience connection issues after following this guide, check the troubleshooting section and review your listener logs at $ORACLE_BASE/diag/tnslsnr/<hostname>/listener/trace/listener.log.
Have you encountered listener configuration challenges in your environment? Share your experience in the comments below!
Related Articles
- ASMSNMP User Setup: Complete Oracle ASM Monitoring Guide
- ORA-12154: TNS:could not resolve the connect identifier specified
- ORA-01555: Snapshot Too Old – Complete Fix Guide for Oracle 19c
- Installing PostgreSQL 16 on RHEL 9: Step-by-Step Guide
Last Updated: December 10, 2025
Tested on: Oracle Database 19c on Oracle Linux 8